I’m sitting here typing this and looking at my brand new clothesline. I have been curious about creating one for a few months, really every since C started wearing Cloth Diapers. Apparently, sunning cloth diapers is a fantastic natural way to to whiten them. For about a week, I have been pinning ideas and had warned Hubs that the day was coming!
It came this weekend.
We drove A to the rink for some practice and then headed to a nearby Home Depot. In my mind I could see a line that would be cheap to install (defined as under $10) and that would not stay up all the time (because since I’m short and Hubs is tall he really would be clotheslined). I really did not want a permanent structure. Hubs asked a few questions and we came up with a small shopping list:
- paracord (8 x 50)
- 2 caribeener clips
- 3 screw eyes that would hold a decent weight (they came in packs of 2 so we bought 4)
We also used these items that we had at home:
- scissors
- a lighter
- a drill
Clothesline Time
I was thrilled to get started and did everything I could to bribe hubs to help me get this project done. He kept saying it wouldn’t take long and he was right. The longest part of it was getting him off the couch.
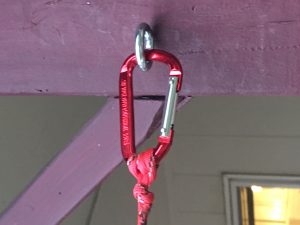
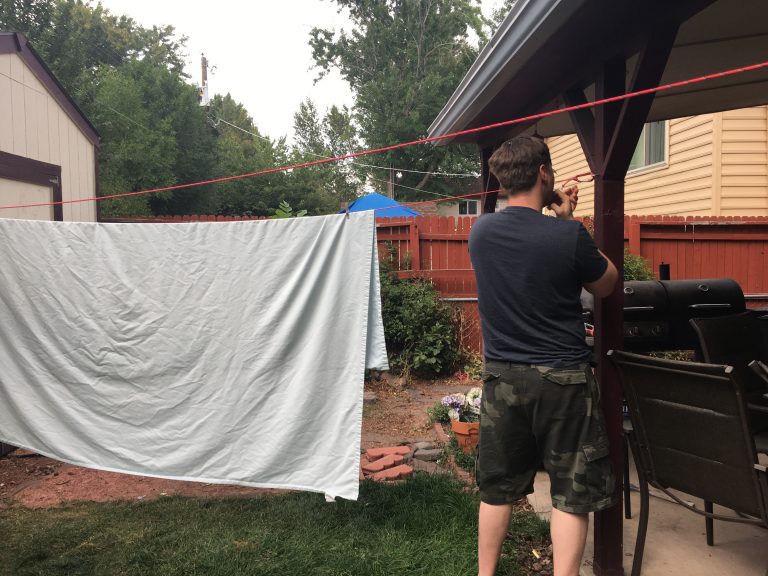
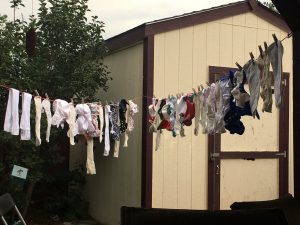
We have a covered patio and a shed in our backyard. So we designated two posts near the shed to be our clothesline posts. Hubs drilled a hole into each post about 5.5 feet up (because again, I’m short) and we screwed in the eyes. Hubs then drilled a hole into the corner of our shed to put the third eye up. After that we tightly tied knots with the paracord on the shed eye. We did the same thing with the caribeener clips and then singed the edges of the cord.
All the while, C was happily playing in a walker on the back patio. She loves the dogs and kept trying to figure out how to get to them!
A little bit of tightening was all our line needed to be completed and I couldn’t wait to test it out! While I waited on Hubs to complete his task, I grabbed a laundry basket and some extra clothespins that I use to keep C’s bows up and set a basket up for our “To Line Dry”.
Hubs finished just in time for our diapers to come out of the washer and so I went to work! I honestly love how great this project turned out. Our climate is pretty dry, so things get dry pretty quickly, which is nice. I’m looking forward to the next day that I dry towels and sheets – because who doesn’t love that fresh scent?
The best part is that our clothesline can be wound up and hung on the eye hook attached to the shed. That leaves our yard open, but still allows us the functionality of a clothesline. I’m pretty stoked. (side note – nobody could have told me at 20 that a clothesline would excite me). Oh well, I’m happy about this addition to our home and yard. Hubs is already expecting the kids to make forts out of sheets along the lines. I’m totally okay with that because it keeps them outside and away from the TV.
Costs
All in, this project cost us about $7. Under perfect operating conditions, it costs about $0.45 to dry a load of laundry according to this article. That means that after $16 loads of laundry are dried on the line we will break even. In cloth diapering lingo (and if I were only using the line to dry cloth) that would be about a month before we broke even. I’ll take that as a win!
I hope you enjoyed this post and let me know if you decide to use a clothesline (or already do)!